Overview
Most households have two gear lives: a summer one full of paddles, sandals, sun hats and ball bags, and a winter one full of skis, sleds, boots and thermal layers. The mistake is trying to keep both within reach all year. A seasonal rotation puts the off-season set into labeled bins on a high or back shelf, and brings the in-season set to the easy spots.
It sounds like extra work, but the swap itself takes an afternoon twice a year, and in return you get a garage or closet that only holds what you are actually using. It is also the natural moment to clean, dry and check everything before it goes away.
Materials
Quantities below are a starting point for a typical space. Adjust them once you have laid your gear out and measured the wall or room.
| Item | Spec to look for | Qty | Notes |
|---|---|---|---|
| Heavy-duty shelving | Steel wire or boltless steel, adjustable | 1 unit, 4–5 shelves | Anchor tall units to the wall |
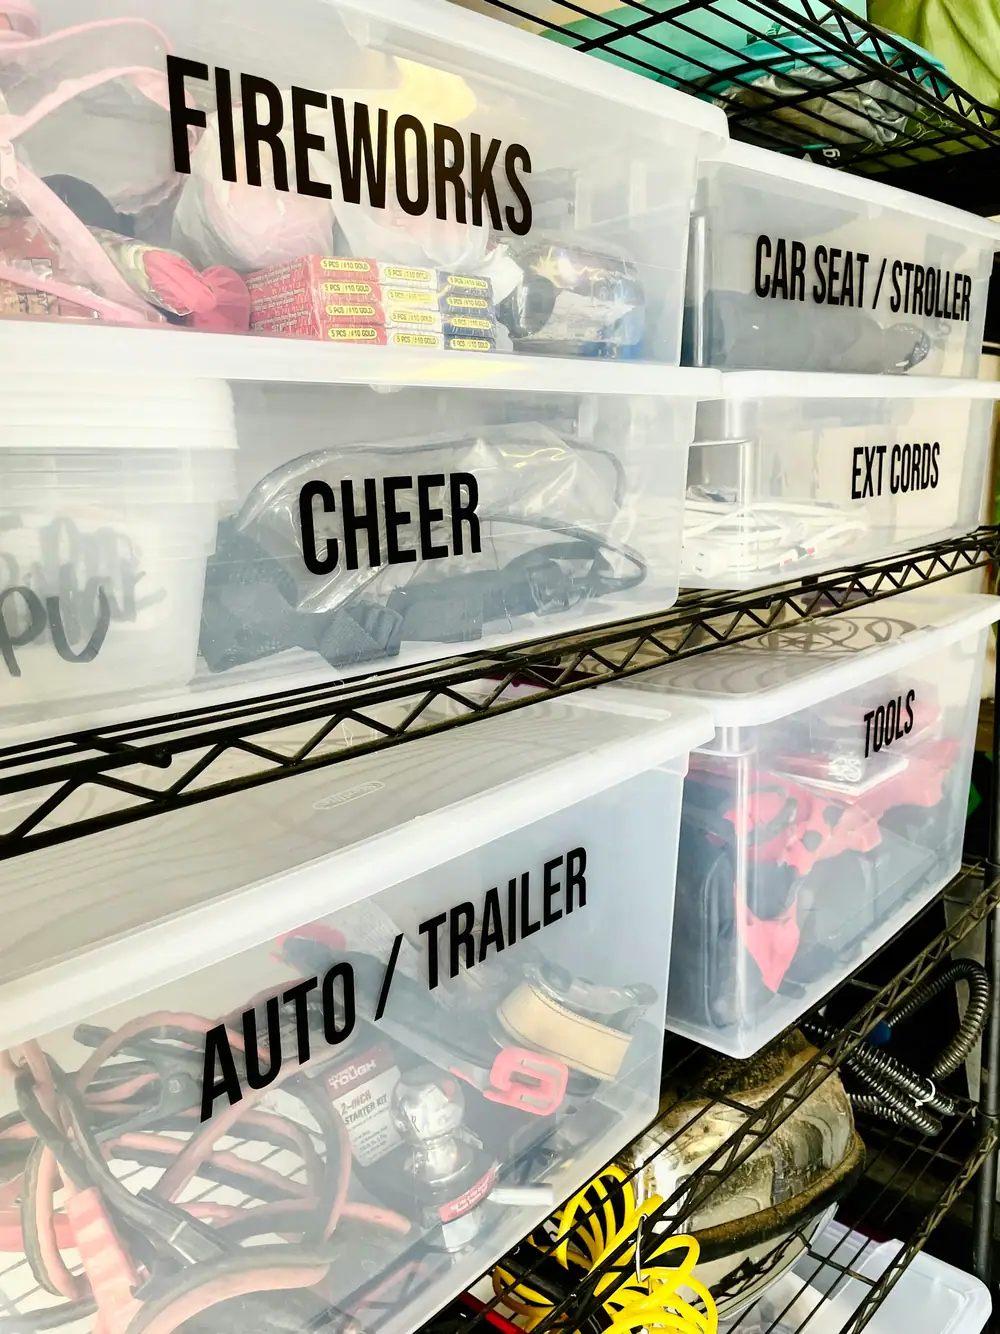
| Clear lidded bins | Stackable, latching lids | 8–16 | Clear sides show contents at a glance |
| Large labels | Bold, readable from a few feet away | 1 per bin | Label the short end that faces out |
| Breathable bags | Cotton or open-weave | A few | For sleeping bags, down layers and anything that should not be sealed |
| Desiccant packs | Reusable silica or similar | 1 per sealed bin | Helps in damp garages and basements |
| Inventory sheet | Printed or on your phone | 1 | A simple list of what lives in each bin |
| Step stool | Sturdy, non-slip | 1 | For reaching the top shelf safely |
Layout tips
Assign shelf heights by how often you will open a bin, not by what is in it. The waist-to-shoulder shelves hold in-season bins. The top shelf and the back of deep shelves hold off-season bins. The bottom shelf is for heavy things like boots and weights, so nobody lifts them overhead.
Name bins by activity and person where it helps: "Ski — Kids", "Beach — Towels and shade", "Camp — Kitchen". Avoid a bin called "Misc"; it grows. If a bin holds items that must breathe, such as a sleeping bag or down jacket, leave the lid ajar or use a cotton sack instead.
Keep one empty bin on the shelf labeled "Needs repair". Anything torn, broken or missing a part goes in there during the swap, so it gets fixed before the season comes back around instead of being discovered on the morning of a trip.
Step timeline
Pick your swap dates
Choose two weekends a year, often around the start of spring and fall. Put them in the calendar.
Pull everything out
Empty the off-season bins and gather the in-season gear that is about to go away.
Clean and dry
Wash, air-dry and inspect everything going into storage. Nothing goes into a bin damp.
Edit
Donate outgrown gear, recycle broken items, and move repair jobs to the "Needs repair" bin.
Pack by activity
Fill bins by activity and person. Heavier items at the bottom, fragile on top, desiccant in sealed bins.
Label and log
Label the outward end and update the inventory sheet so you can find items without opening every lid.
Rotate the shelves
Move the new in-season bins to the reach shelves, off-season bins up and back.
Options compared
| Container | Best for | Strengths | Watch-outs |
|---|---|---|---|
| Clear latching bin | Most gear, garages | See contents, stackable, keeps dust out | Can trap moisture; everything must be dry |
| Opaque tote | Sun-exposed shelves | Blocks light that fades fabrics | Must rely on labels |
| Cotton or open-weave sack | Sleeping bags, down, wetsuits | Breathable, lets items stay lofted | No protection from dust or pests |
| Vacuum bag | Synthetic clothing only | Saves space | Not for down or insulation you want to loft again |
| Wall-mounted overhead rack | Garages with high ceilings | Uses dead space | Heavy lifting; keep lighter bins up there |
Do and don't
Do
- Dry and clean everything before it is stored
- Label the end that faces out
- Keep a written inventory
- Anchor tall shelving to the wall
Don't
- Seal damp gear in a plastic bin
- Compress sleeping bags or down for months
- Create a "Misc" bin
- Put heavy bins on the top shelf
Checklist
Seasonal Bin Rotation checklist
Prepare
- Swap weekends on the calendar
- Shelving anchored and level
- Bins, labels and desiccant ready
- Inventory sheet started
Swap day
- All outgoing gear washed and fully dry
- Outgrown gear set aside to donate
- Repairs moved to "Needs repair"
- Bins packed by activity and labeled
After
- In-season bins on reach shelves
- Off-season bins up and back
- Inventory updated
- Repair jobs scheduled