Overview
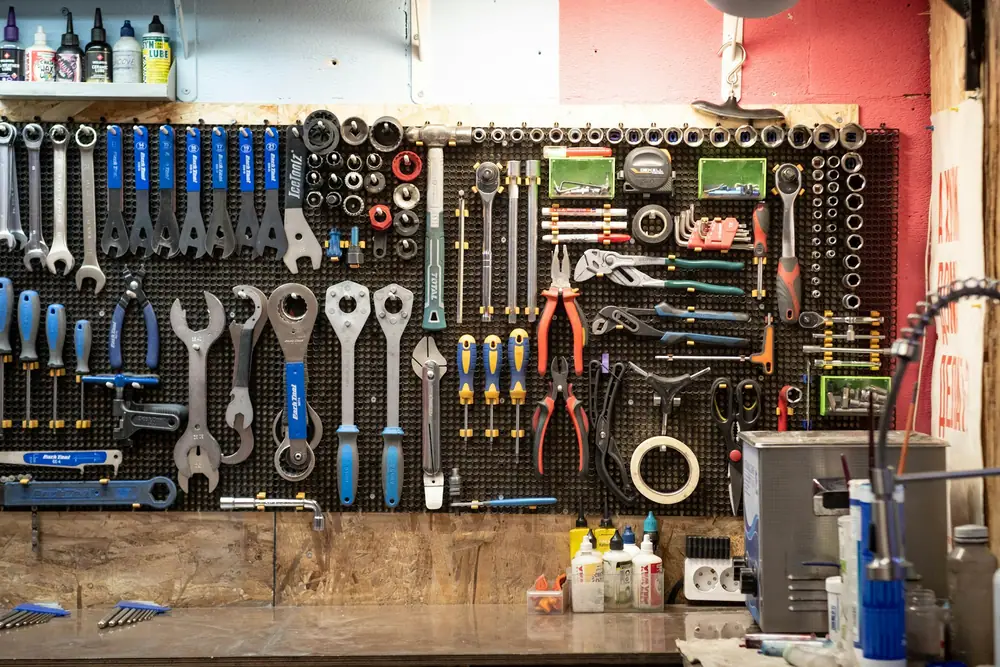
A pegboard wall is the most forgiving storage system you can put in a garage. Everything hangs where you can see it, nothing gets buried at the bottom of a bin, and when your family picks up a new sport you simply move a few hooks instead of buying another shelving unit. For sports and outdoor gear it works especially well for the awkward middle-sized items: bike helmets, pumps, gloves, headlamps, water bottles, climbing slings, shin guards and the tangle of straps that otherwise ends up on the floor.
The trick is treating the wall as a planned zone rather than a random board of hooks. Below you will find what to buy, how to mount the board so it actually holds weight, a sensible layout by reach height, and a checklist you can print and tape to the wall while you work.
Materials
Quantities below are a starting point for a typical space. Adjust them once you have laid your gear out and measured the wall or room.
| Item | Spec to look for | Qty (one 8×4 ft bay) | Notes |
|---|---|---|---|
| Pegboard panels | 1/4 in hardboard or steel, 1/4 in holes on 1 in centers | 2 panels, 4×4 ft | Steel panels carry more and do not sag when damp |
| Furring strips | 1×3 in or 1×2 in lumber | 4–5 strips, 8 ft | Creates the gap hooks need behind the board |
| Wood screws | #10, 2½–3 in, into studs | 20–30 | Always hit studs; drywall anchors alone are not enough |
| Washers | Flat, to suit screws | 20–30 | Spread the load on hardboard so screws do not pull through |
| Hook assortment | Single, double, J-hooks, loops, shelf brackets | 30–50 pieces | Buy locking hooks or use pegboard clips |
| Small bins | Pegboard-mount bins | 4–8 | For lip balm, valves, spare laces, tire levers |
| Stud finder, level, drill | — | 1 each | A laser level speeds up long runs |
| Label tape or paint pen | — | 1 | Label zones, not individual hooks |
Layout tips
Stand in front of the wall and divide it into three height bands. The reach band, roughly waist to shoulder height, is prime real estate: put daily-use gear here, such as helmets, gloves, the floor pump and the bag you grab on the way to practice. The high band above head height suits things you use weekly or seasonally, like spare tubes, climbing ropes in their bags or a folded tarp. The low band near the floor is for heavy or dirty items that you do not want to lift, like cleats in a boot tray or a kid-height row of hooks so younger players can hang their own gear.
Next, group by activity rather than by item type. A "bike" cluster holds helmets, lights, the pump, a multitool and a chain-lube bottle in a small bin. A "field sports" cluster holds shin guards, a ball net and water bottles. When everything for one activity lives together, packing takes one trip to the wall instead of five. Leave about a quarter of the board empty on day one; you will fill it within a season.
Finally, think about water. Wet gloves and helmet pads dry far better on an open hook than in a bag, so give damp items the spots with the best airflow, away from the corner and not directly above anything that should stay dry.
Step timeline
Find and mark studs
Use a stud finder to mark every stud across the bay and snap a vertical chalk line on each. Most garage studs sit on 16 in centers, which gives you three or four fixing lines per 4 ft panel.
Fix the furring strips
Screw horizontal furring strips across the studs at the top, bottom and middle of where each panel will sit. Check each strip with a level; a crooked strip becomes a crooked board.
Pre-drill and hang the panels
Lift the first panel onto the strips, level it, and drive screws with washers through the pegboard holes into the strips. Work from the center outward so the panel stays flat.
Test the load
Hang your heaviest planned item (often a loaded helmet bag or a pump) and push down firmly. The board should not flex or creak. Add screws where it does.
Lay out by zone
Place hooks for each activity cluster using the height bands above. Photograph the finished layout so hooks that wander can be put back.
Lock the hooks
Fit pegboard clips or zip-tie hooks to the board so they do not fall out every time you lift gear off.
Label and review
Add simple zone labels ("Bike", "Field", "Water"). Revisit the layout after a month and move anything you reach for awkwardly.
Options compared
| System | Best for | Strengths | Watch-outs |
|---|---|---|---|
| Hardboard pegboard | Light to medium gear, tight budgets | Inexpensive, easy to cut, widely available | Can sag or swell in damp garages; seal or paint it |
| Steel pegboard | Heavier gear, humid spaces | Rigid, holds more per hook, wipes clean | Costs more; edges need care when cutting |
| Slatwall panels | Mixed gear, a finished look | Hooks slide and lock, very tidy appearance | Uses its own hook system; higher cost per foot |
| Rail or track systems | Bikes plus small gear on one wall | Very strong, add bike hooks and baskets later | Fewer small-item accessories than pegboard |
| French cleat wall | DIY builders, custom holders | Cheap to make, infinitely customizable | Every holder has to be built or bought separately |
Do and don't
Do
- Screw into studs through furring strips
- Group gear by activity, not by type
- Keep a quarter of the board free for growth
- Hang damp gear where air moves
Don't
- Mount pegboard flat against drywall with no gap
- Rely only on plastic drywall anchors
- Hang bikes or heavy bags from standard pegboard hooks
- Store fuel or chemicals directly above sports gear
Checklist
The Pegboard Gear Wall checklist
Before you start
- Clear the wall and sweep the floor below
- Mark studs with chalk lines
- Measure the bay and buy panels to fit
- Sort gear into activity piles on the floor
Build day
- Furring strips level and screwed to every stud
- Panels fixed with washers, center outward
- Load test with the heaviest item
- Hooks locked with clips or ties
Finish
- Zone labels added
- Photo of layout saved
- Damp-gear hooks near airflow
- Review date set for one month out